How It Works
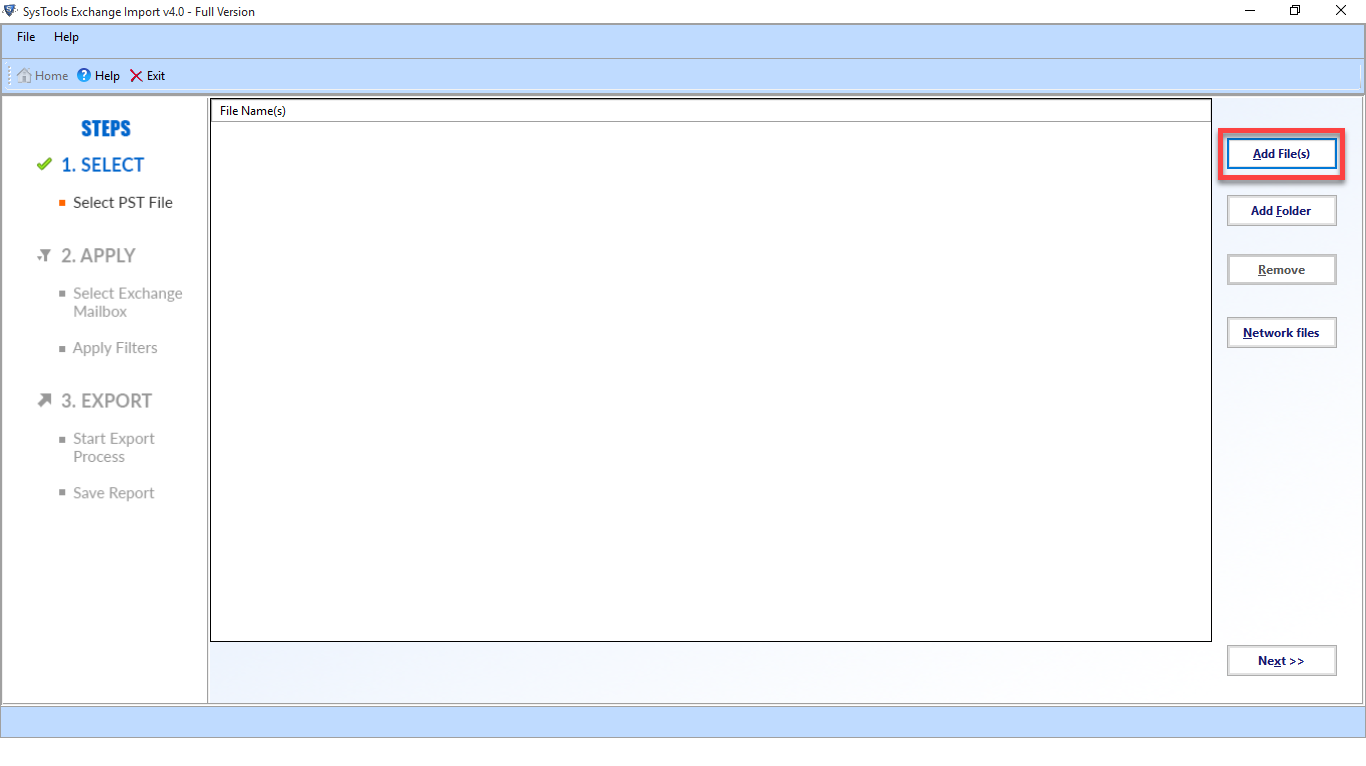
Step 1: Go to Start Menu » Click on All Programs button » Exchange Import » Click on "Add File" option
Add File: This option allows you to choose single or multiple PST file for conversion procedure.
Add Folder: It allows you to choose the folder where numerous PST files are stored.
Remove: If the user wants to unselect the selected PST file, then use this option.
Network Files: This option can be used in the case if the users want to export the outlook.pst files across the local network. As the users click on this option, application will locate the entire machines available on that network.
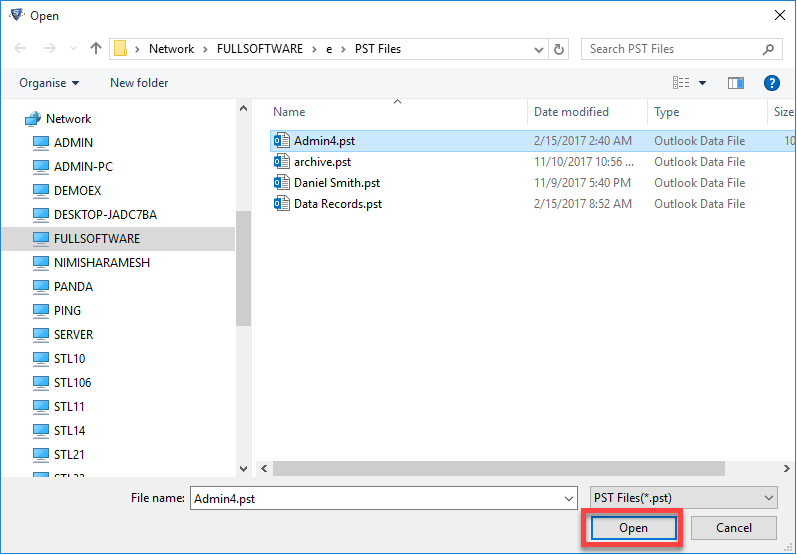
Step 2: In the next window, Browse the PST File within the system
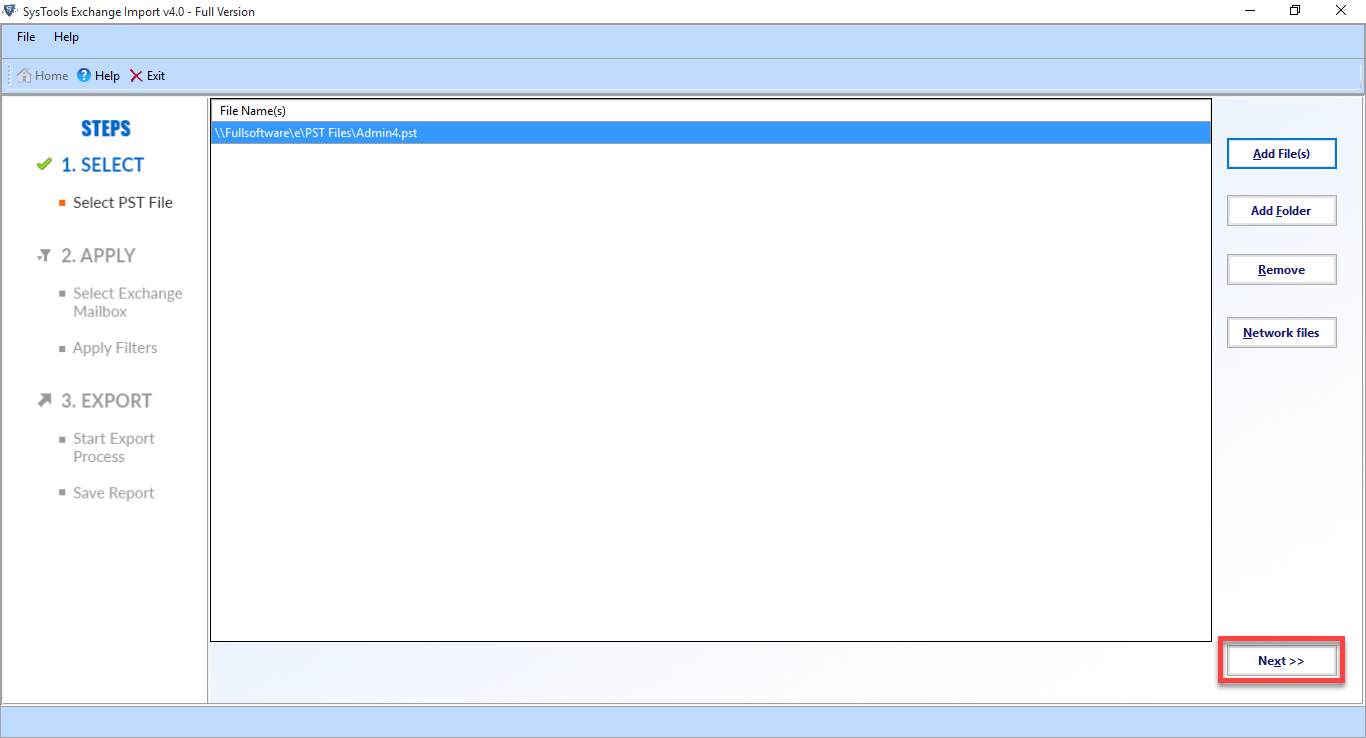
Step 3: To Add PST File, Click on "Next" option.
Step 4: Provide Exchange Credentials such as Admin SMTP Address, Password & Active Directory IP, Server IP.
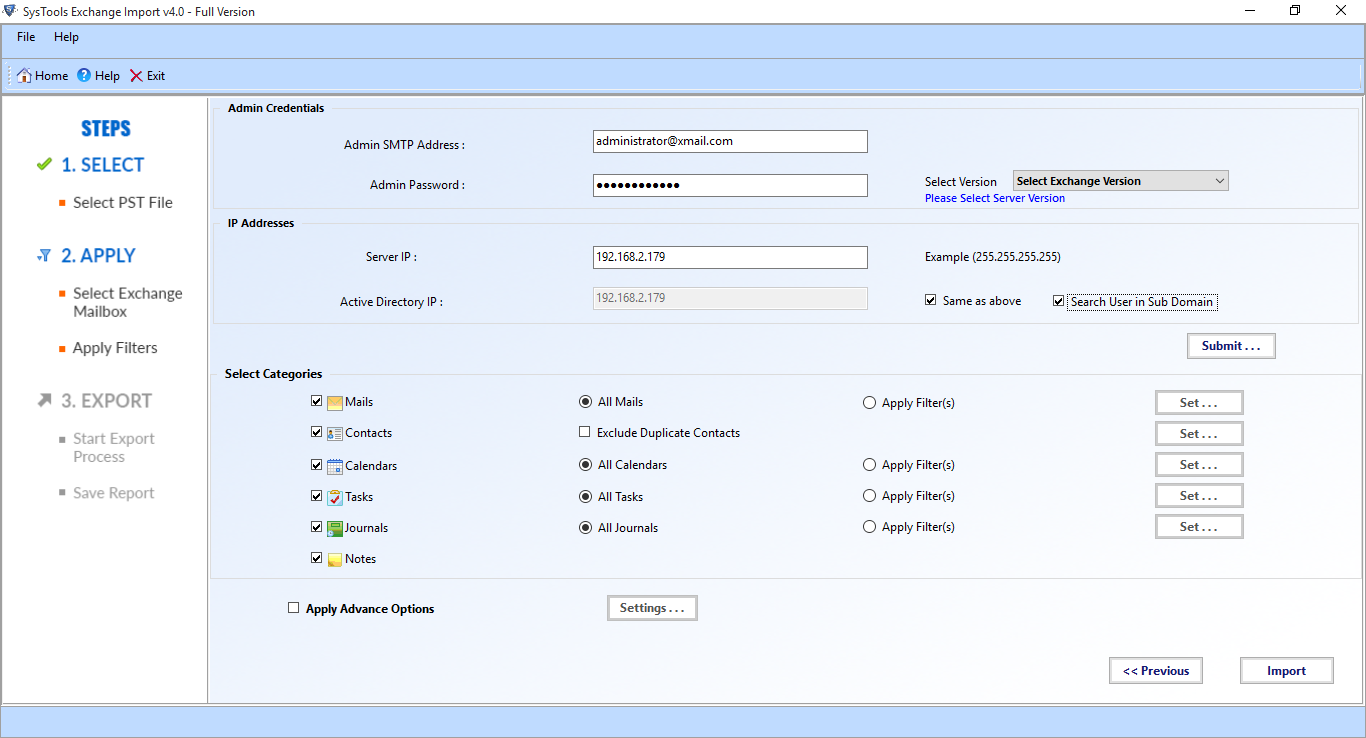
Step 5: Now Software Verify Credentials and provide the mailbox credentials to which PST data is to be migrated:

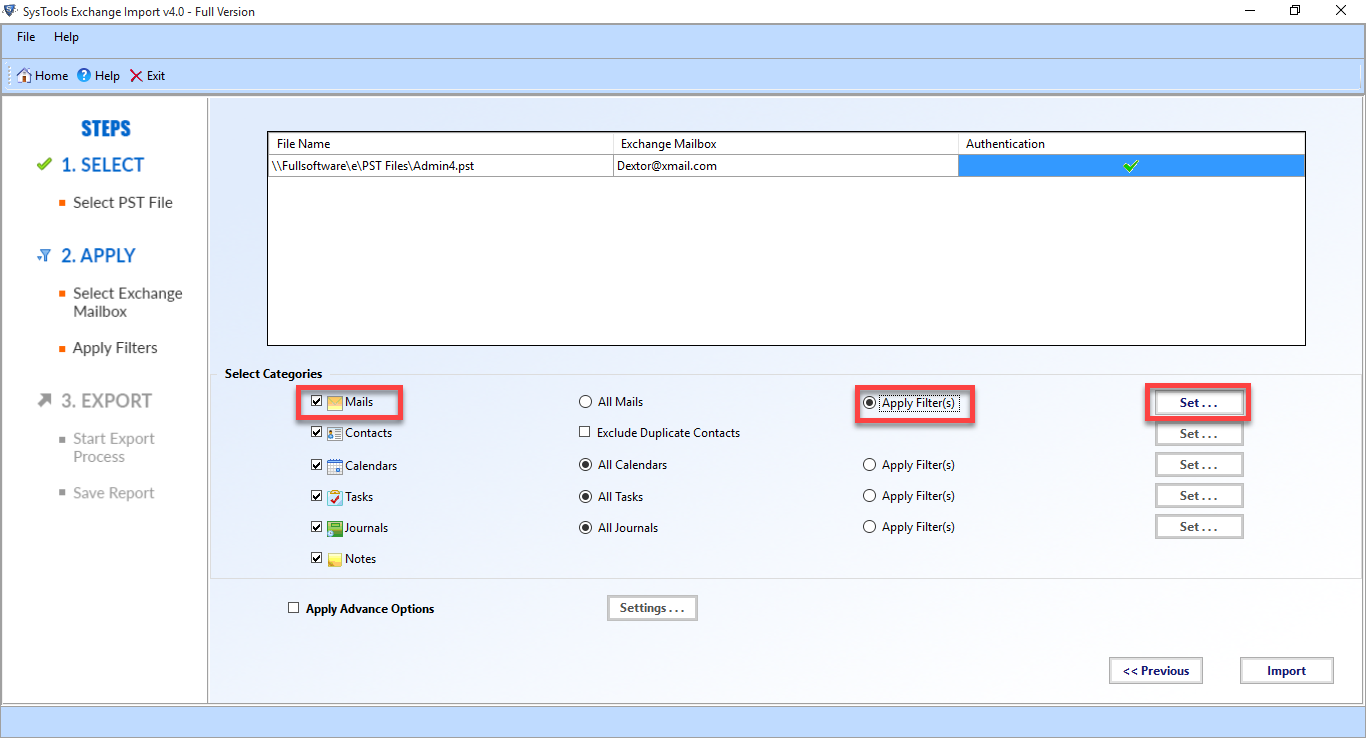
Step 6: On the "Mails" option, Use "Apply Filter(s)" radio button to use "Date-Range" Filter, for that click on the "Set" button.
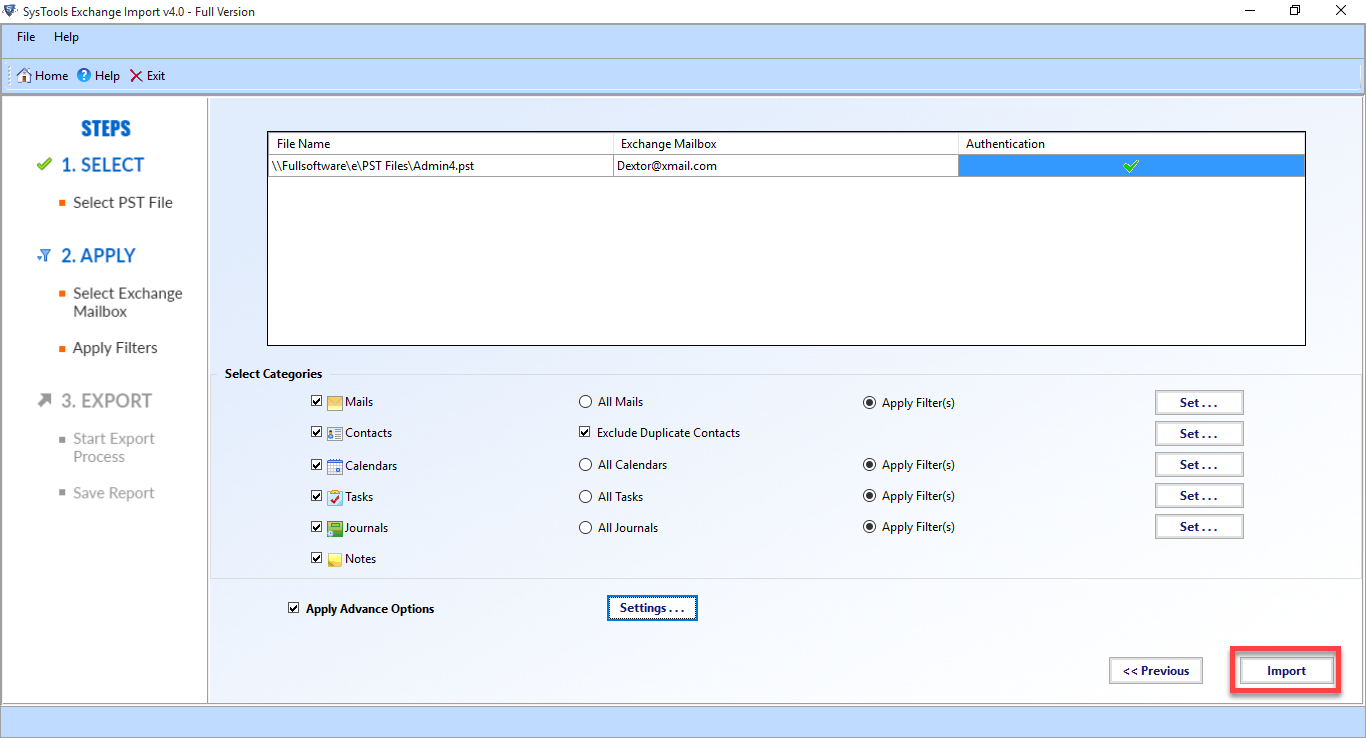
Step 7: After Selecting different mailbox section and Advance Filter, Click on " Import" button to start the Migration process.
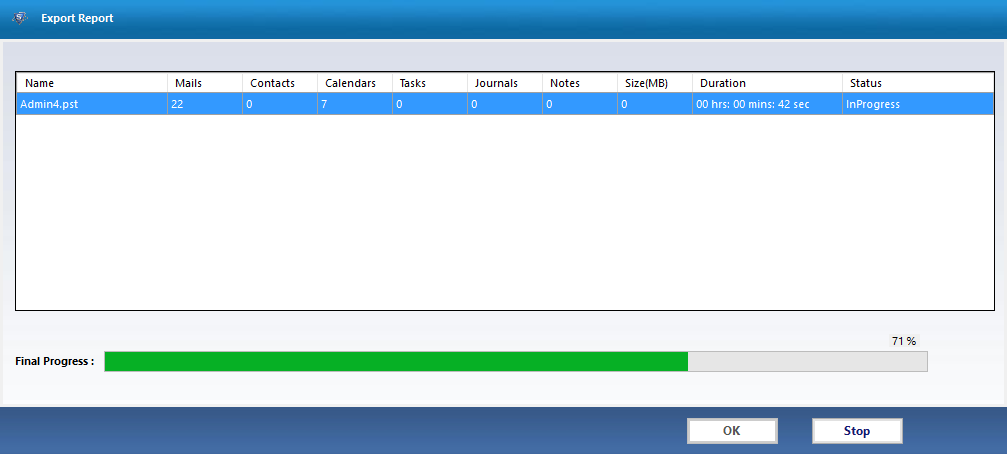
Step 8: Now view the live progress report of Migration Process. After The Export process will be completed successfully.Click on the "OK" button