![]()
Steps to Export Mailboxes from Exchange Server (.EDB) to MS Outlook (.PST)
View simple screen instructions of theToolbox to recover emails, contacts, calandars, tasks, notes, journals etc from (.EDB) and convert into MS Outlook (.PST) files.
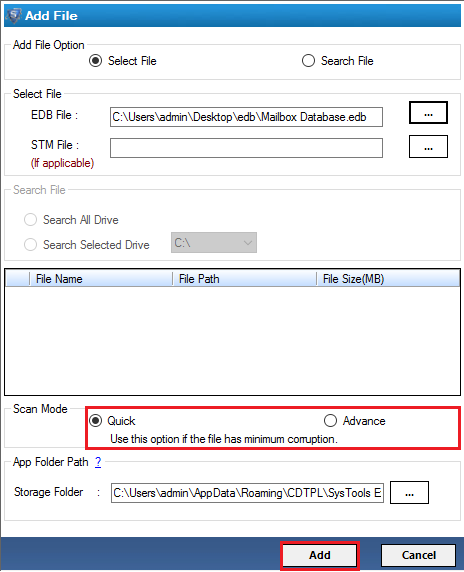
Step 1: Run the Software, Then click on Add file option.

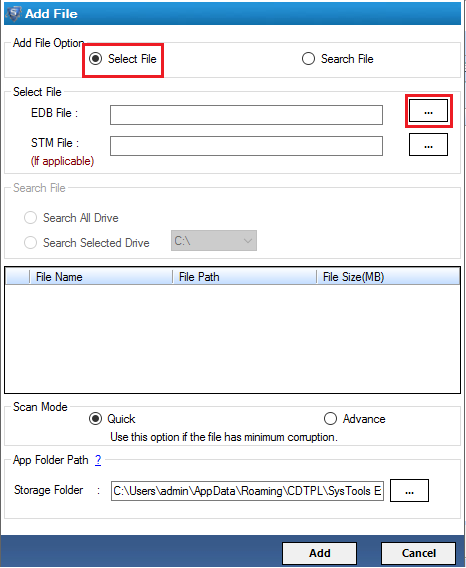
Step 2: After clicking "Add File" button, software gives you two options such as A) Select File, B) Search File
A) If user know the location of EDB file then they can choose "Select File" option and Click on Browse option to select .edb file from local path and then hit on "Add" tab from the bottom
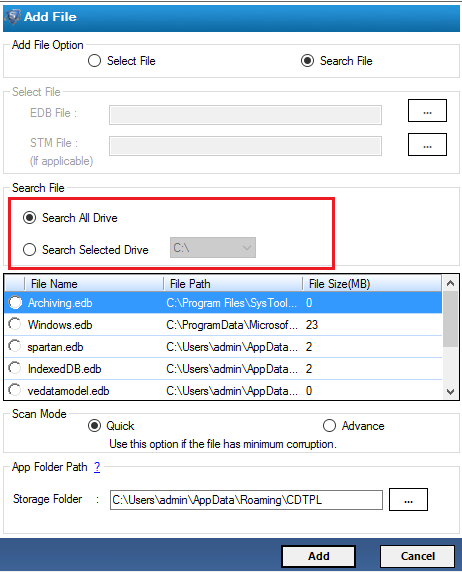
B) If users don't know the location of EDB file then they can choose "Search File" option, in this section users get the two options
Once users select the drive then click on "Search" button from the bottom.
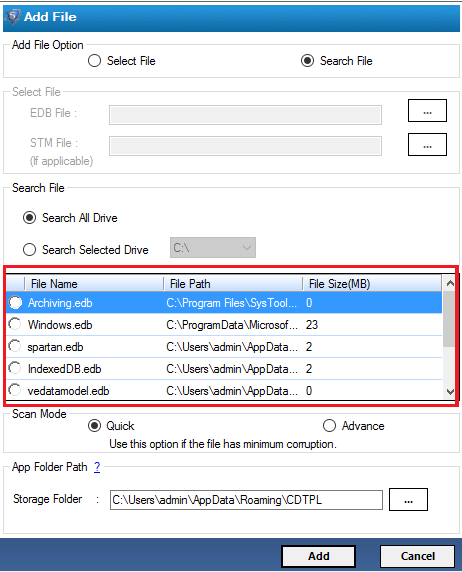
Step 3: Now software will start searching process, once it successfully completes then software show the list of all EDB files.
Now select any EDB file from the list which you want to recover.
Step 4: After browsing EDB file, need to select recovery option. Software provides two scanning options i.e. "Quick" & "Advance"
Note: If your Exchange database file is highly corrupted then you can use Advance Scan option will show at the end.
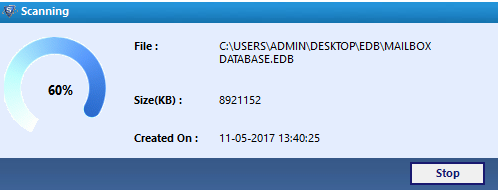
Step 5: You can see EDB file scanning process.
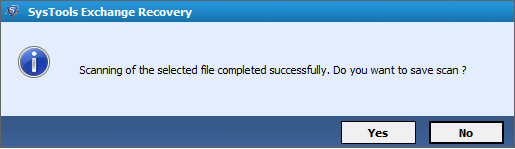
Step 6: After that pop-up window shows the scanning process successfully completed.
Step 7: After this process you can view user mailboxes and click on + to expand folder to view mailbox items.
You can view mailbox item details through a Normal Mail View by clicking on particular item like: email, journal, notes, tasks, contacts, calendar etc.
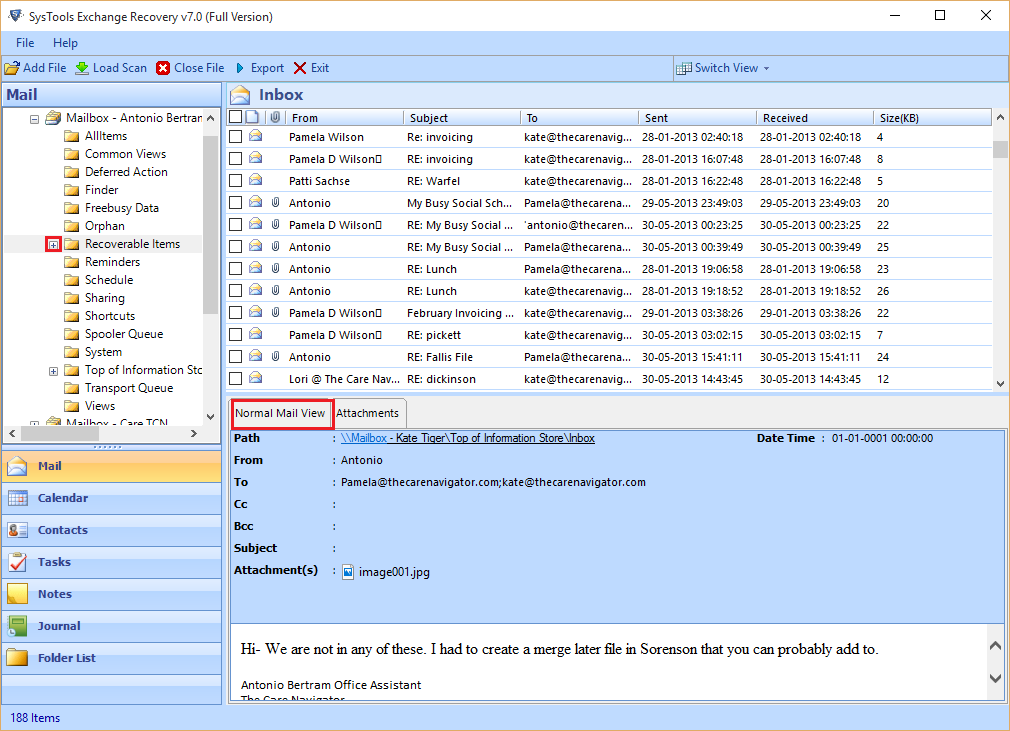
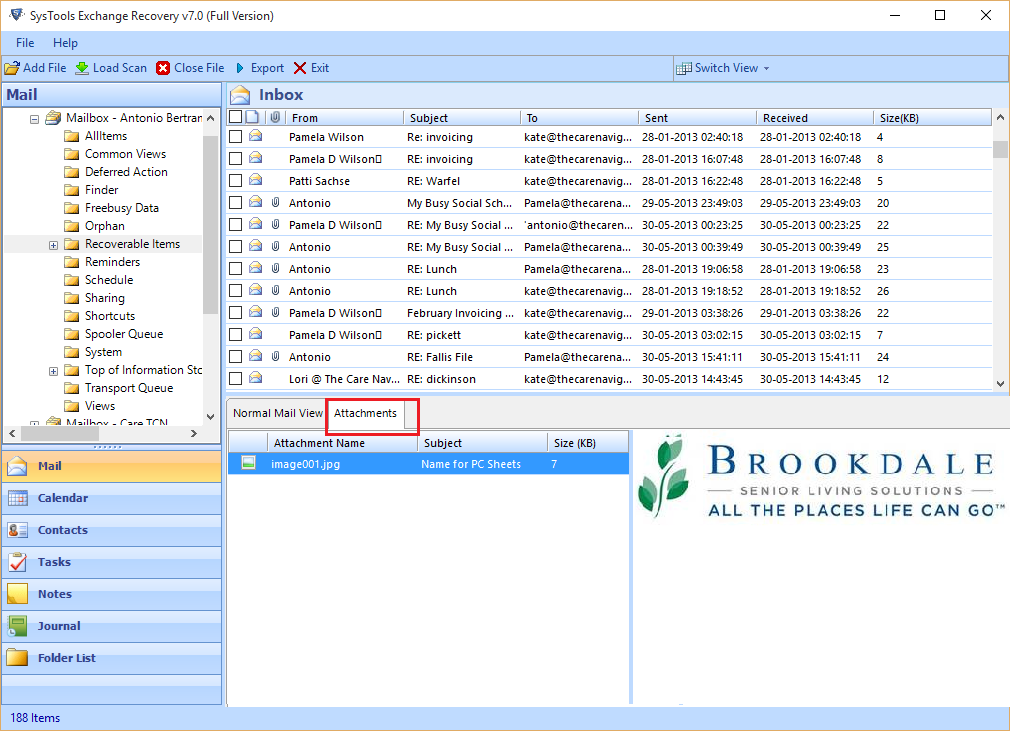
Step 8: After that you can view the attachment to simply click on the Attachment option that given below.
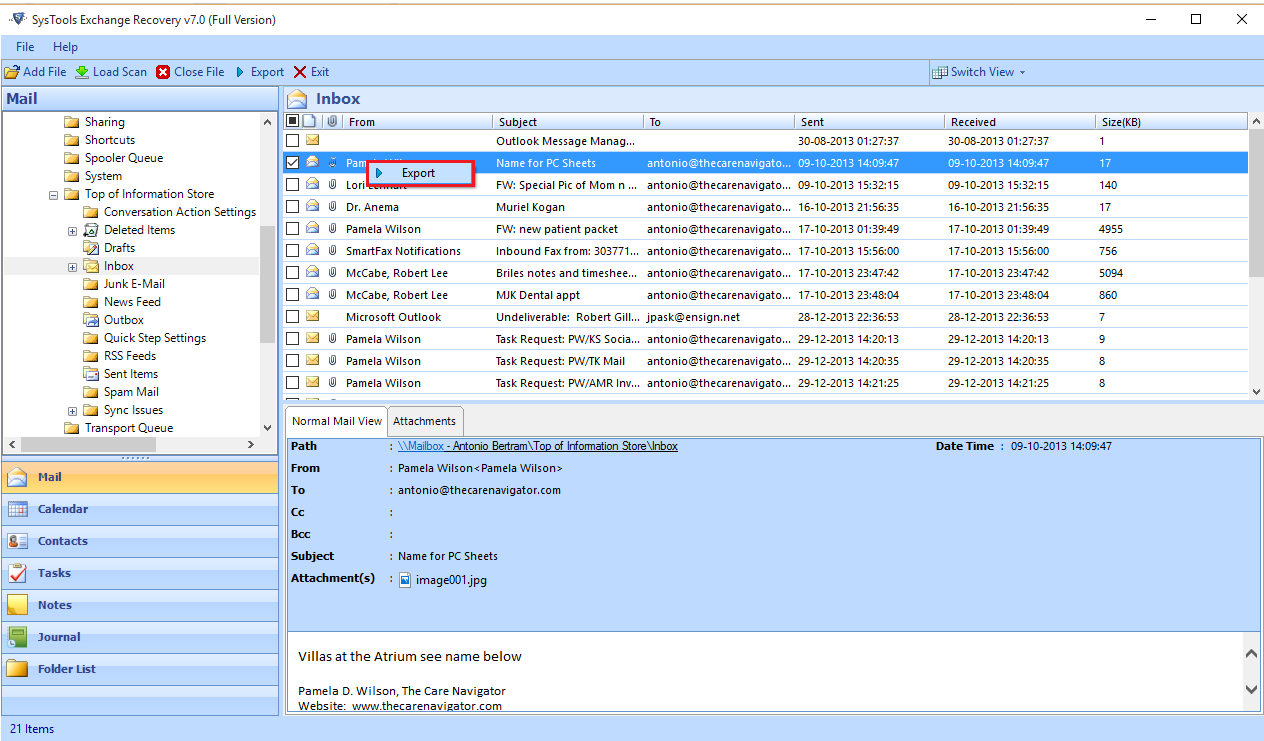
Step 9: Select single or numerous items and right click & then click on the Export option on them to export emails into PST file format directly.
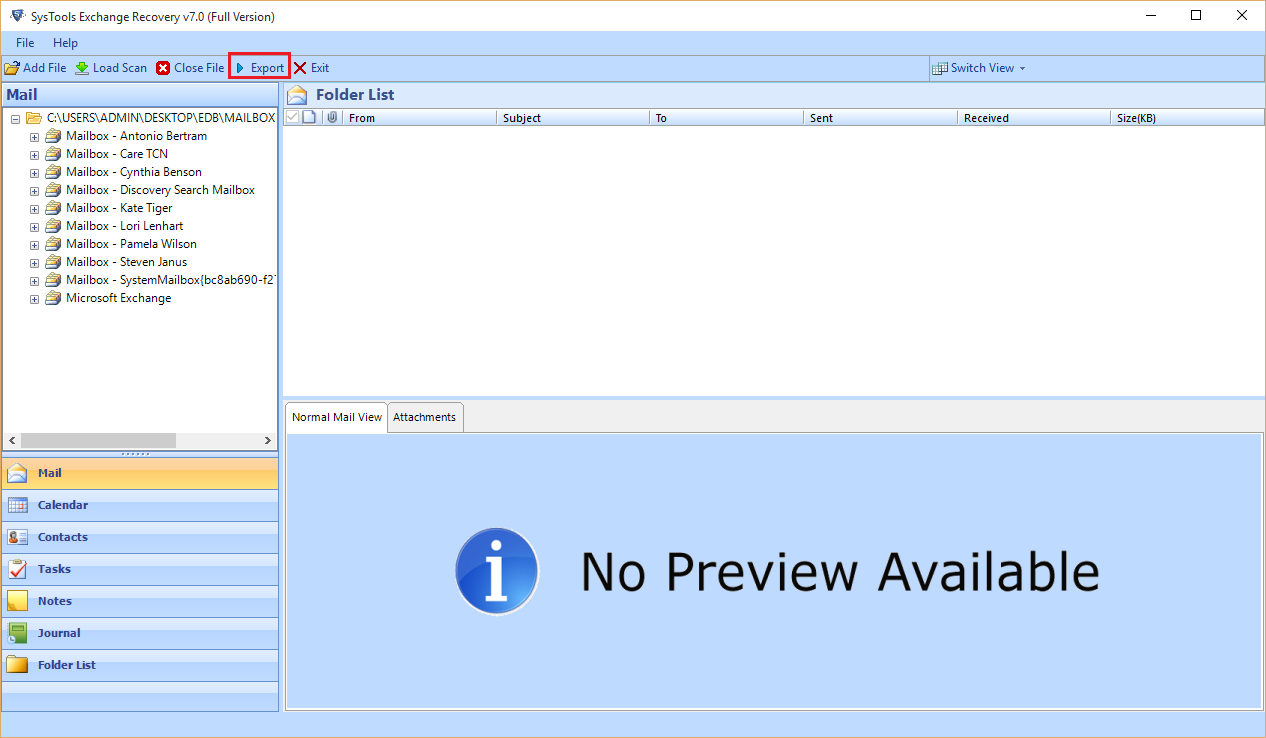
Step 10: Or else click on top of Menu Export into PST format.
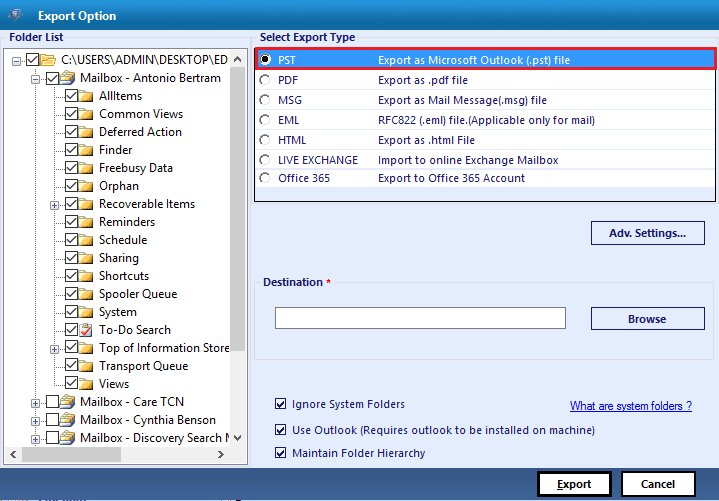
Step 11: Then click on the PST option to convert the repaired EDB files into Outlook PST file format and select the desired path to saving the file. In this window you can browse and choose the destination place to restore/save PST file. Users can check or uncheck mailboxes (in right side panel) which they want to transfer.
Choice of Split PST: Users can assign the size limit to a PST file among 1GB to 45 GB or 100 MB to 46080MB before saving it. Now click on Export choice.
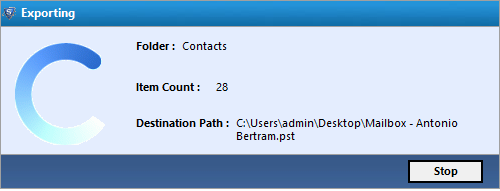
Step 12: After that a pop-up window will show in which users can see the exporting procedure.
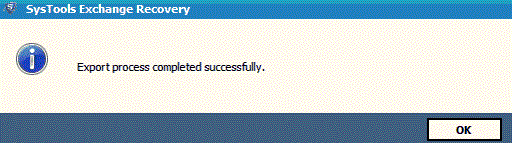
Step 13: Next window shows a message "Export process Complete".
Step 14: After this process tool also create a report in CSV format for the resultant file location.
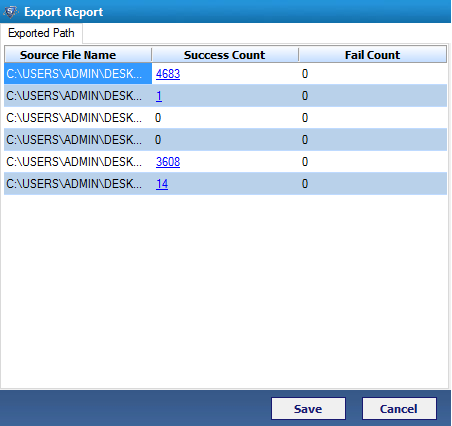
Step 15: Then if you want to save report click on save option otherwise click on cancel to ignore it.
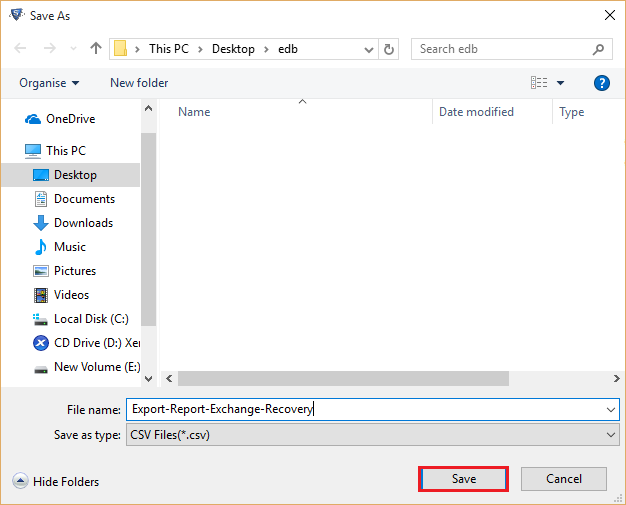
Step 16: Then CSV Report saved at your desired location that you want.
Step 17: Open Microsoft Outlook email client and import Output .pst file.
Choose the File option from menu bar to start adding the PST file on it
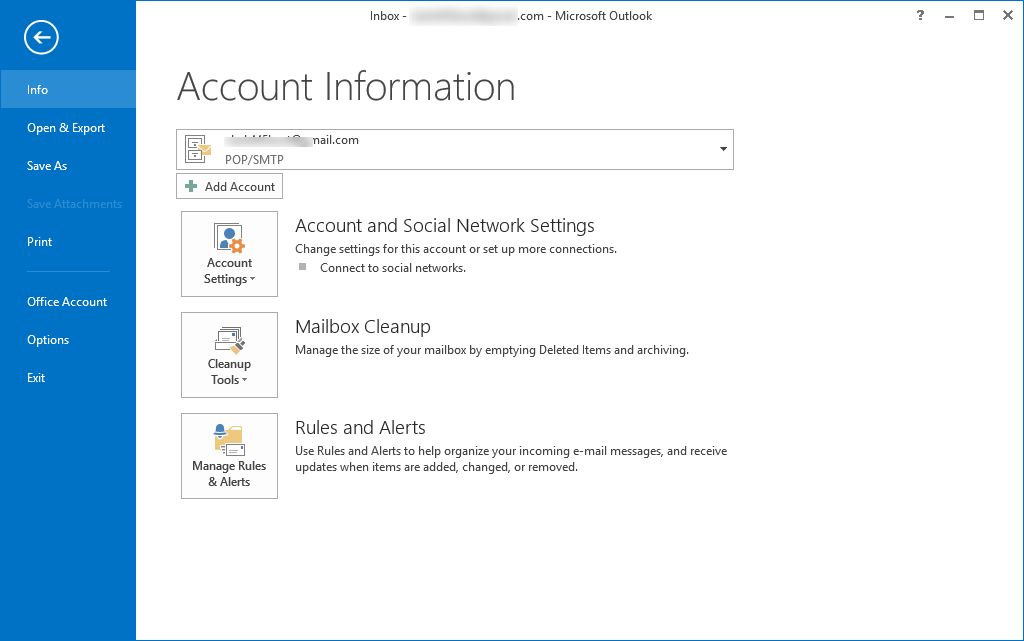
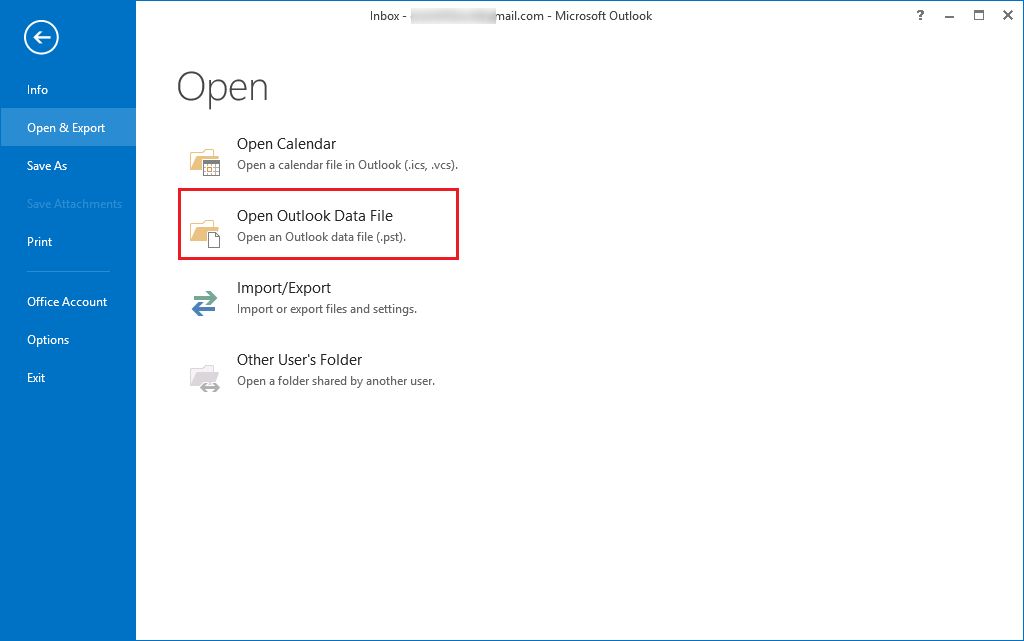
Step 18 Add Outlook PST file: Select Open & Export option from the left pane and then choose Open Outlook Data file option.
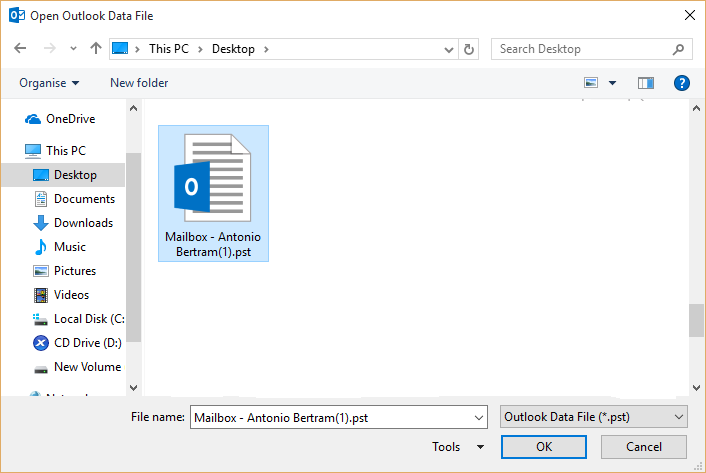
Step 19: Browse the location then choose the PST file and then hit on open tab.
Step 20: The mailbox items can get located in separate pane, explore folders with emails individually.